
Product/March 12, 2026
How to Create Gorgeous Product Photos in 3 Steps

SK
Co-founder
Learn how to create stunning AI product photos with Pebblely in just 3 steps: add your product, generate, and download. No photoshoot needed.
You don't need a photographer, a studio, or an entire afternoon to get great product photos anymore.
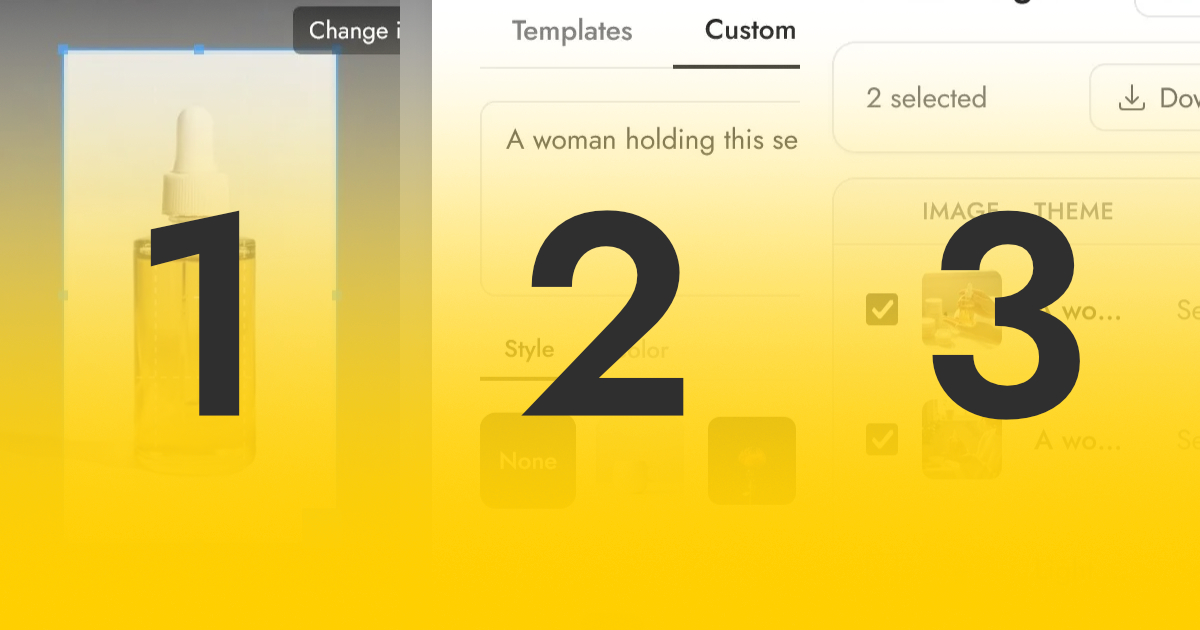
With the new Pebblely, you can go from a single product image to a set of ready-to-use photos in under a minute. The entire process is three steps: add your product, generate images, and download.
Here's exactly how it works.
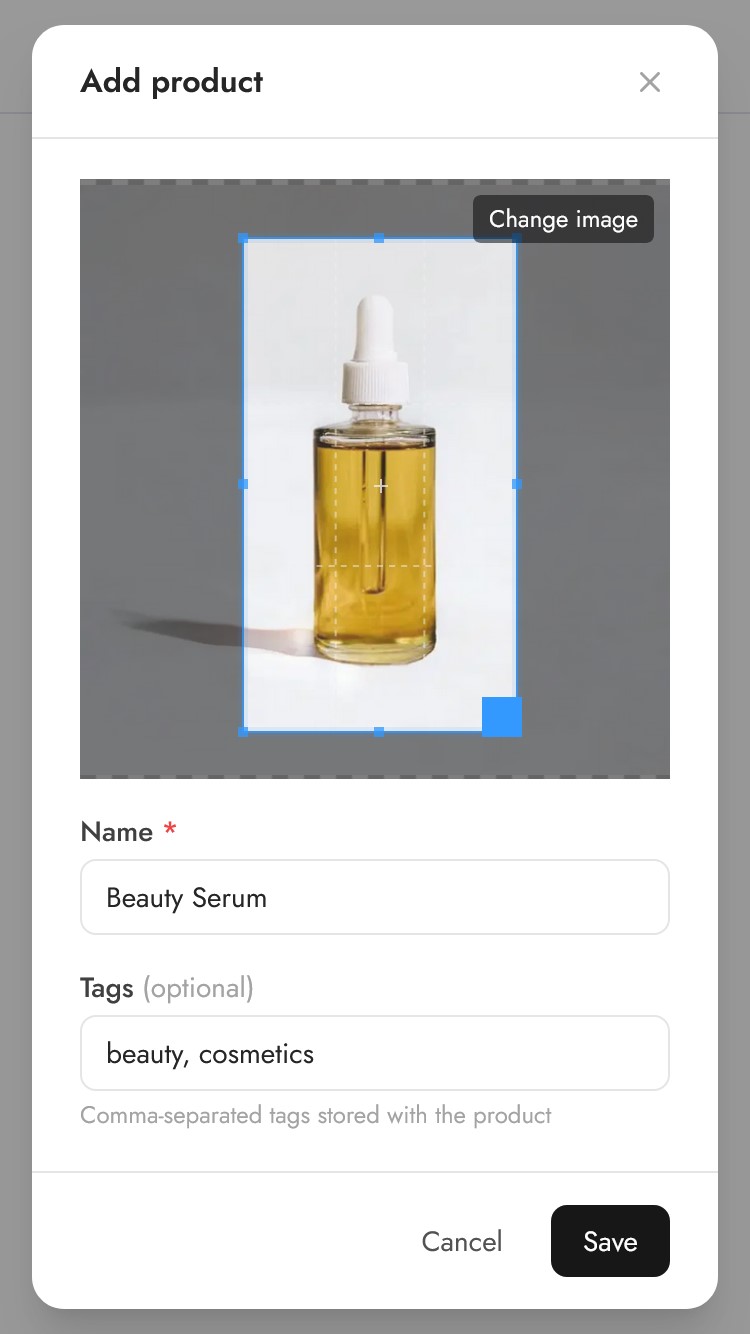
Step 1: Add your product
Click Add product on the home screen. You'll see a simple form where you upload an image of your product.
A few tips for your product image:
- Use a clear, well-lit photo. Natural lighting works best. The AI uses this image to understand what your product looks like, so clarity matters.
- Crop tightly to your product. You don't need to remove the background, Pebblely handles that automatically. But make sure your product fills most of the frame so the AI doesn't get confused by other objects in the shot.
- A smartphone photo is fine. You don't need a professional camera. Any recent smartphone can take a sharp enough image.
Give your product a name (e.g. "Lavender Face Serum") and add optional tags to keep things organized. Then click Save.
That's it. Your product is now in your library and ready for generating.
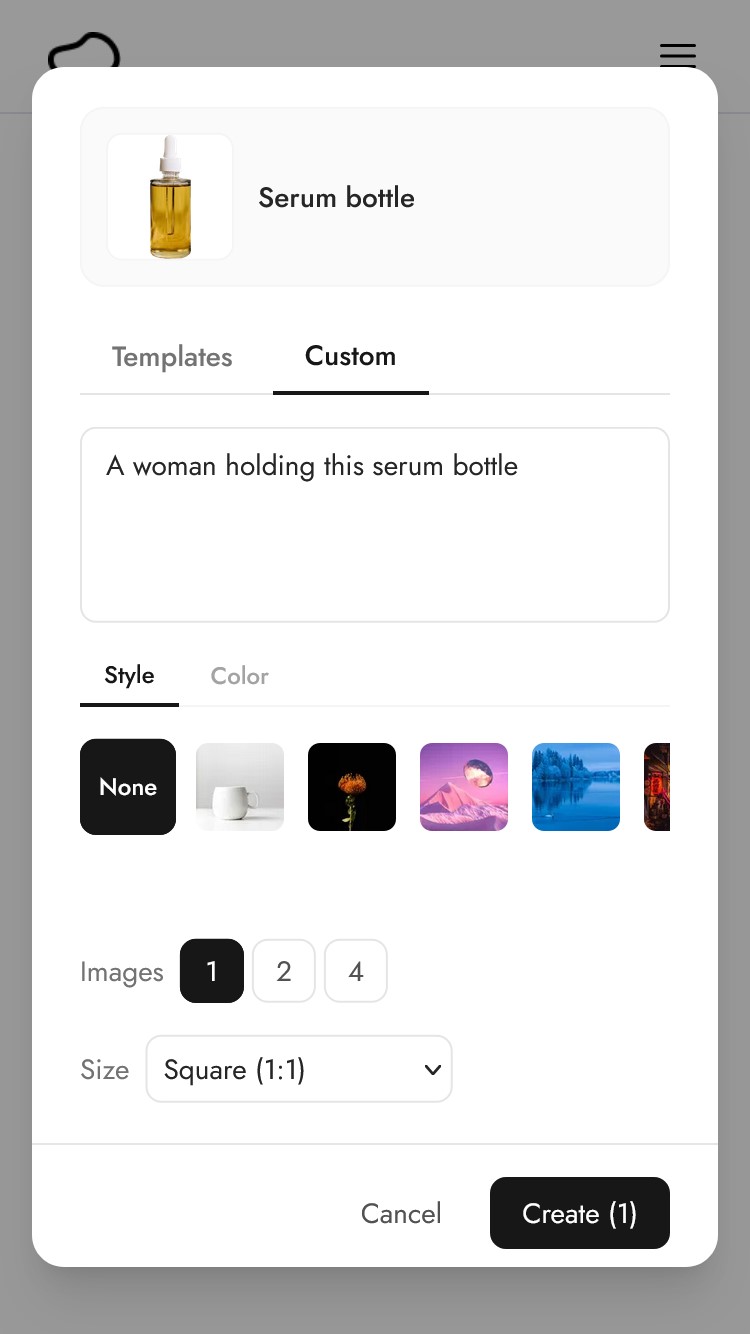
Step 2: Generate images
Click on your product to open the generation screen. You'll see two tabs: Templates and Custom.
Option A: Use a custom prompt
If you have something specific in mind, switch to the Custom tab and describe the scene you want. For example:
- "On a marble countertop with soft morning light and a vase of dried flowers"
- "A woman holding this perfume bottle in a sunlit garden"
- "Flat lay on a wooden table with coffee beans scattered around"
The AI is surprisingly good at interpreting natural language, so describe the scene the way you'd describe it to a photographer. The more specific you are, the closer the result will match your vision.
You can also pick a style image to influence the overall aesthetic, or a color to match your brand palette.
Option B: Use a template
If you need some inspiration, templates are the fastest way to get results.
Pick from 40+ pre-made themes - Studio, Cafe, Water, Kitchen, Nature, and many more. Then hit Create.
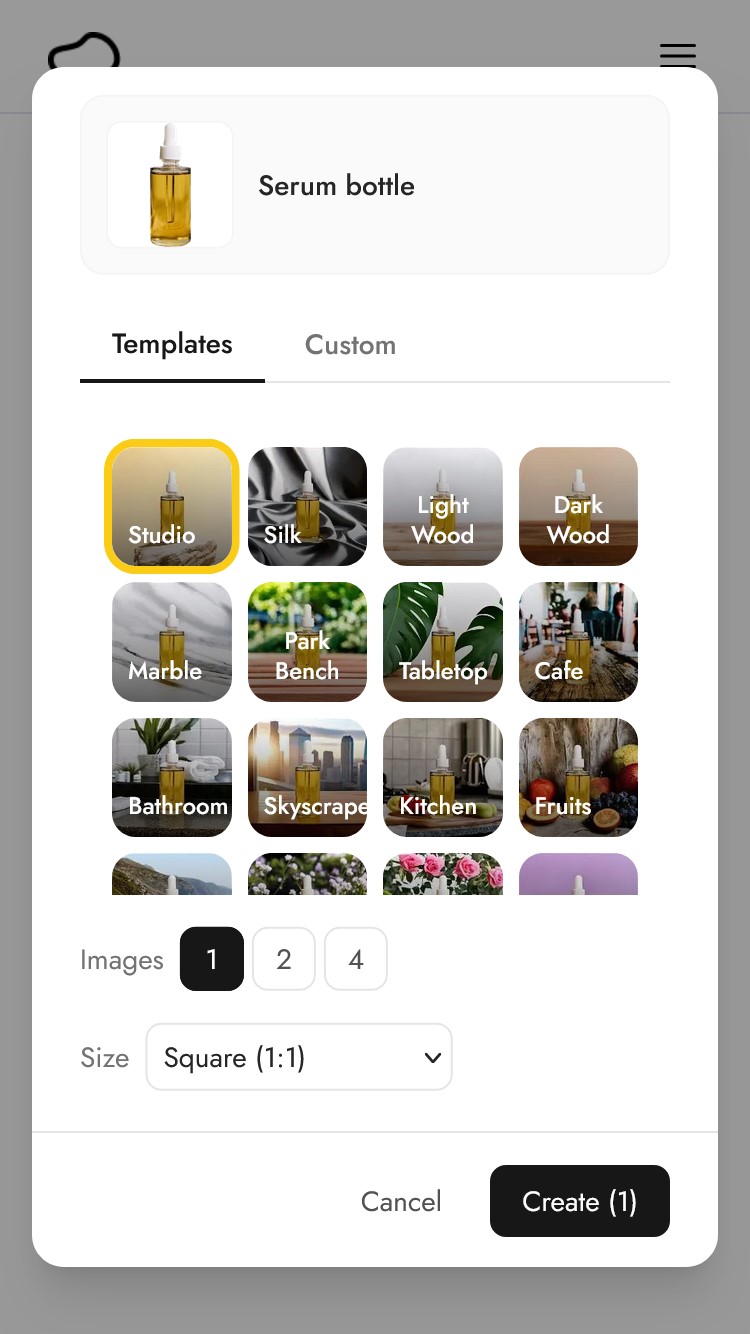
Each template is designed to place your product in a specific setting with appropriate lighting, shadows, and props. No typing required.
Choose your settings
Before you hit Create, pick two things:
- Number of images: Generate 1, 2, or 4 images at a time. Generating multiple gives you more options to choose from.
- Image size: Choose from Square (1:1), Portrait (4:5), Story (9:16), Landscape (16:9), or Facebook Ad. The AI composes the image for the format you choose, so a Story image won't just be a cropped version of a Square, it will be generated with the vertical layout in mind.
Then click Create. Each image takes about 10 seconds to generate.
Step 3: Download your photos
After you click Create, you're taken to the Recent Images screen where your images appear as they're generated.
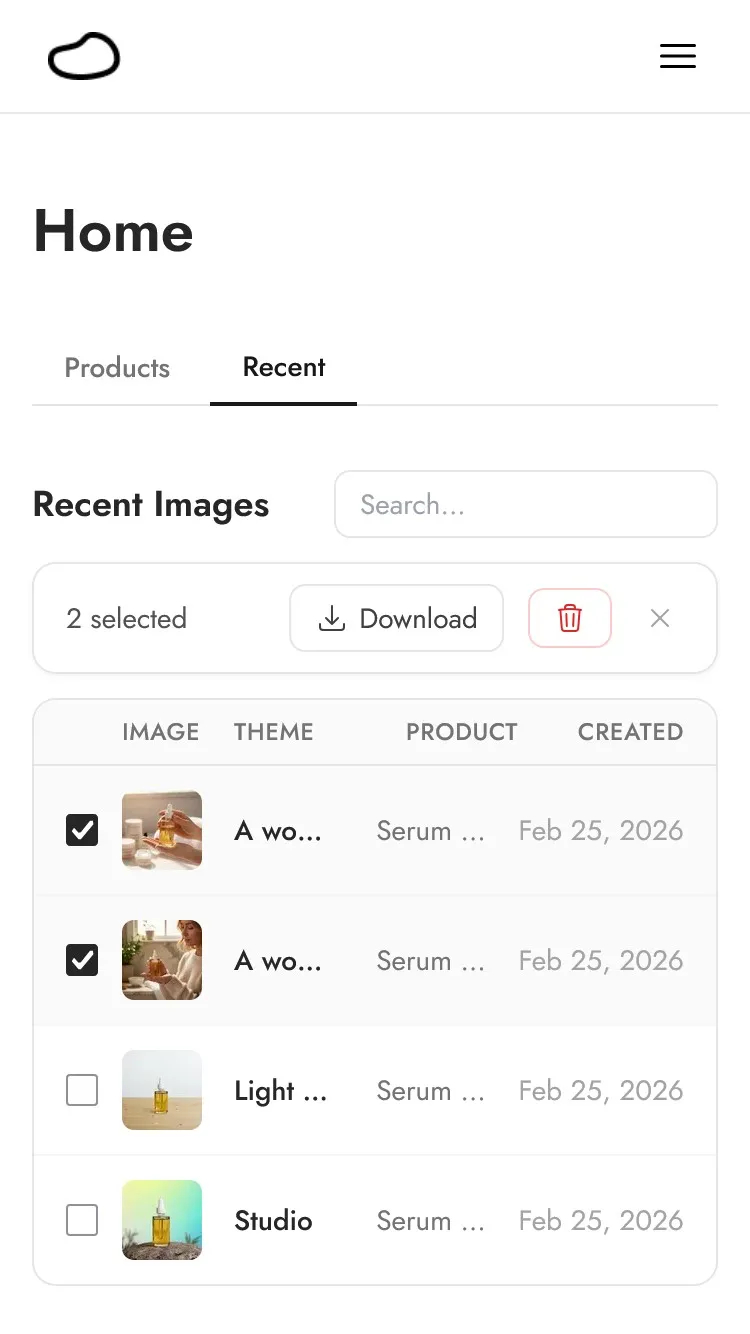
Click on any image to view it at full size. If you like it, hit the download button. Done.
If you generated multiple images and want to download several at once, use the checkboxes on the left side of each image, then click Download to grab them all in one go.
A real example: from photo to finished images
Let's say you sell a skincare serum. Here's what the process looks like end to end:
- Add product: You snap a photo of the bottle on your desk, upload it, crop it to the bottle, name it "Glow Serum", and save.
- Generate: You click on the product, switch to Custom, and type "on a bathroom shelf with towels and eucalyptus in the background". You pick Square (1:1) and generate 4 images.
- Download: Ten seconds later, you have four variations. You pick the two you like best and download them.
Total time: about one minute. Total cost: 4 credits.
Now repeat with a different prompt (e.g. "a woman applying serum to her face in front of a mirror") and you have lifestyle images too. Change the size to Story (9:16) and you've got Instagram Stories content.
From one product photo, you can generate dozens of unique images across different scenes, styles, and sizes.
Tips to get the most out of each step
When adding your product
- Name products clearly. If you have many products, clear names and tags make it easier to find them later, especially when using bulk generate.
When generating
- Try templates first. If you're not sure what you want, start with a few templates to see what styles work for your product. Then switch to Custom to fine-tune.
- Be specific with custom prompts. "On a table" will give you generic results. "On a rustic wooden table with soft window light and a small potted plant" will give you something much more intentional.
- Use style images for brand consistency. If you have existing marketing images you like, use them as style references. The AI will pick up on the colors, mood, and aesthetic.
When downloading
- Generate before you filter. It's faster to generate 4 images and pick the best 1-2 than to generate one at a time hoping for a perfect result.
- Use bulk download for efficiency. If you're generating images for your entire product catalog, select all the ones you like and download them in a batch.
Try it yourself
You can start creating product photos with Pebblely right now. Log in now and follow the three steps above.
Keep learning
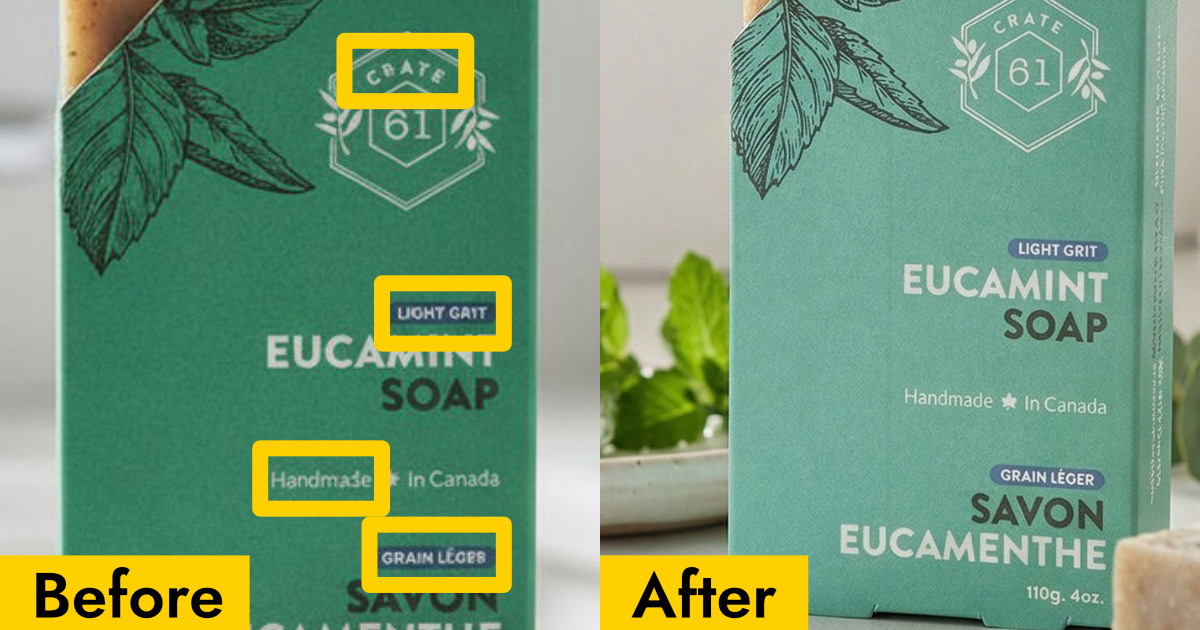
Why Your AI Product Photos Keep Getting the Text Wrong (and How to Fix It)
AI image generators often garble text on products. Learn how Pebblely automatically extracts and preserves text on labels, packaging, and branding.
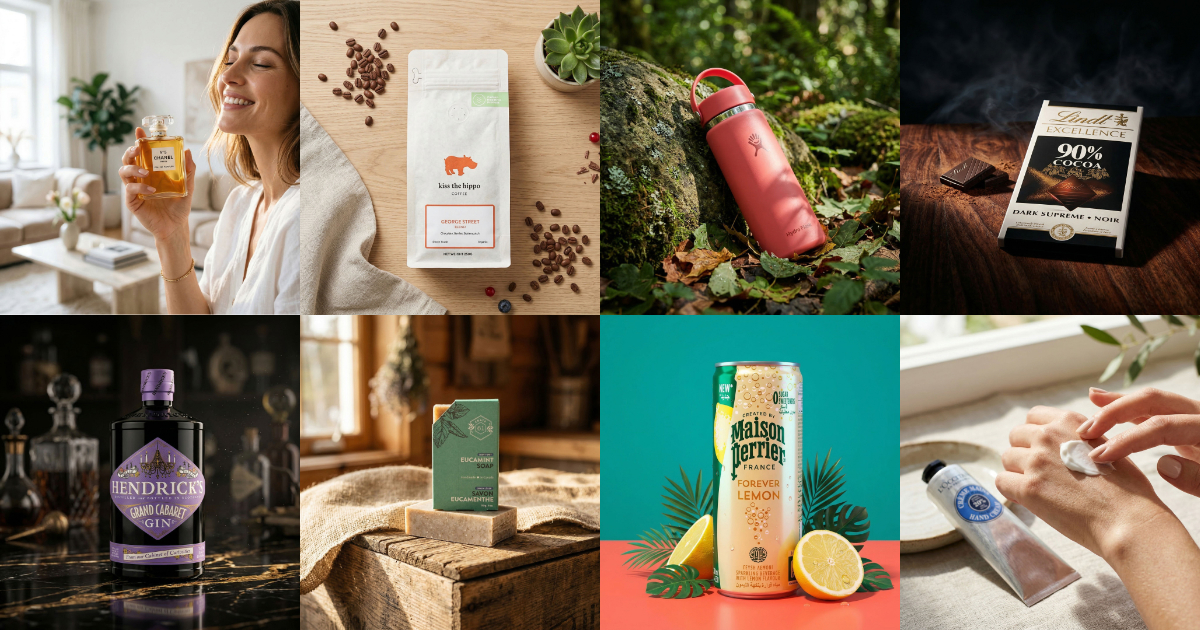
10 AI Product Photography Prompts That Work
Struggling with AI product photo prompts? These 10 tested prompts generate beautiful, realistic product images every time.
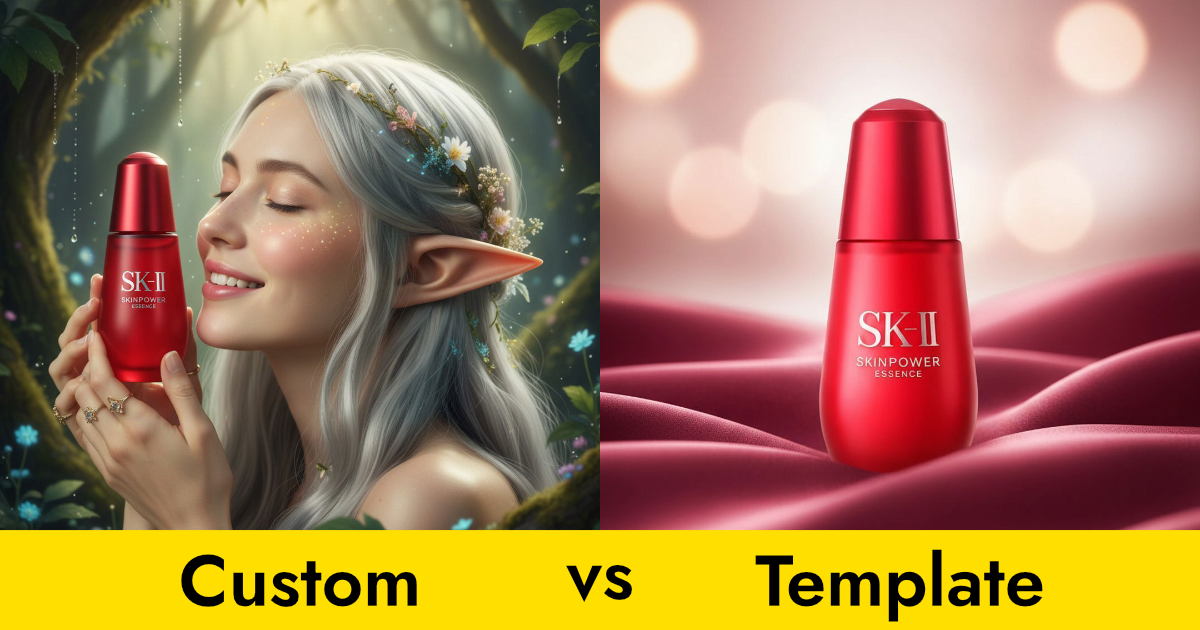
Custom Prompts vs Templates: Which Should You Use?
Pebblely offers two ways to generate product photos: templates and custom prompts. Here's when to use each for the best results.