
Product/May 8, 2023
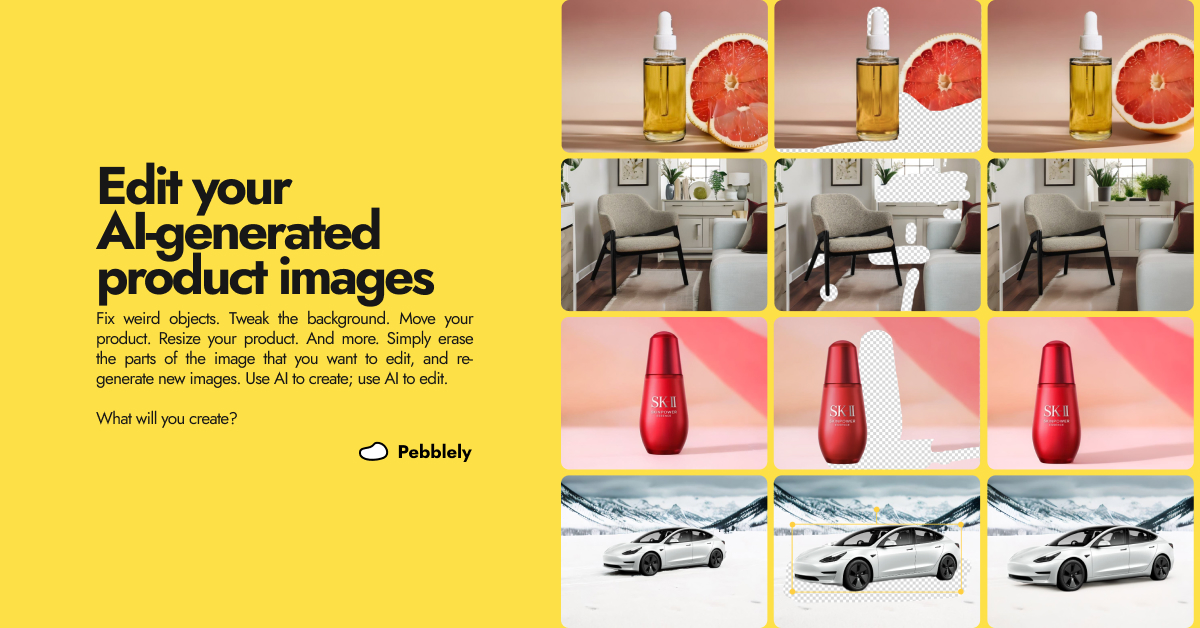
How to Edit AI Product Images in Pebblely

Alfred
Co-founder
This article was written for a previous version of Pebblely.
The interface and features described here may no longer be accurate. Check out our updated guide or latest blog posts for current information.
You can now fix weird objects, tweak the background, and adjust your product in your generated images. Just move, erase, and re-generate.
You generated an awesome background with Pebblely… but there is just this one annoying thing about it.
Maybe there’s a weird object in it.
Or something was added to your product.
Or part of the background looks terrible.
Or your product is in the wrong position.
Or your product has the wrong proportion.
Well, you can now fix all these with Pebblely’s new editing feature.
Check out these examples:
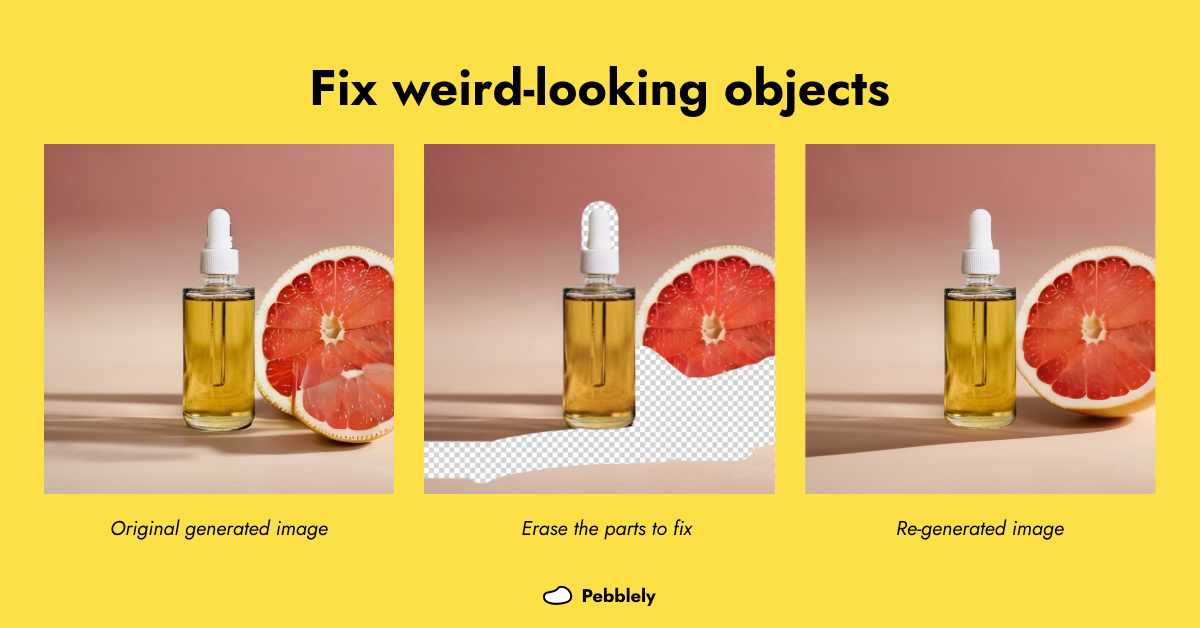
I fixed the weird-looking grapefruit and the black border around the bottle cap.
I re-generated several parts of the background to get a slightly different background.

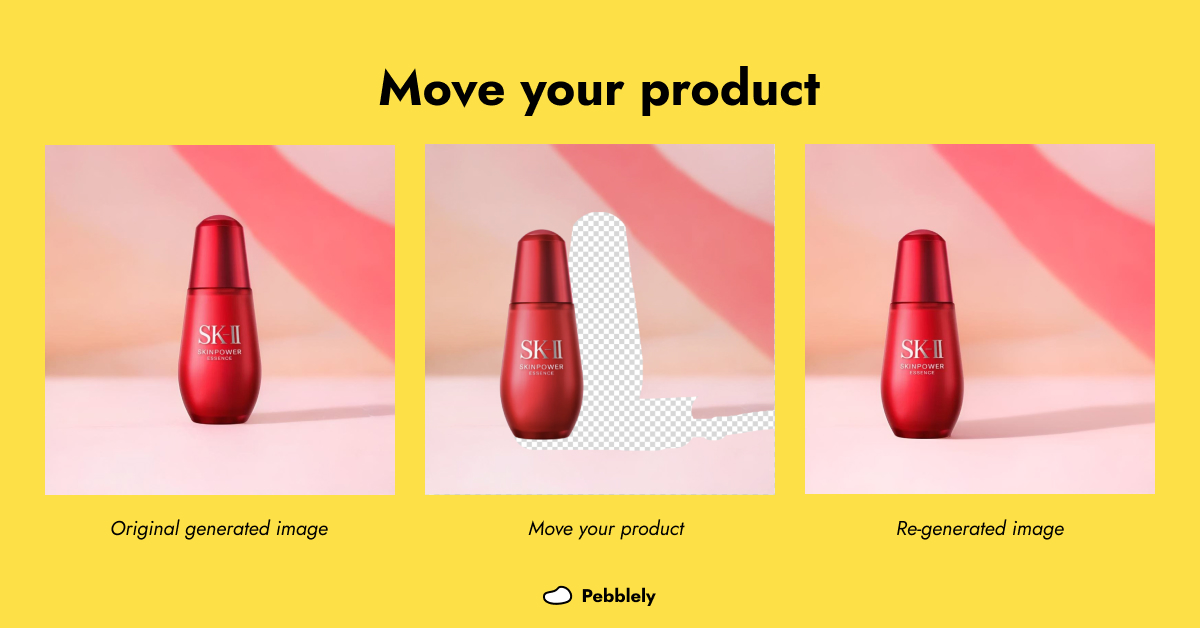
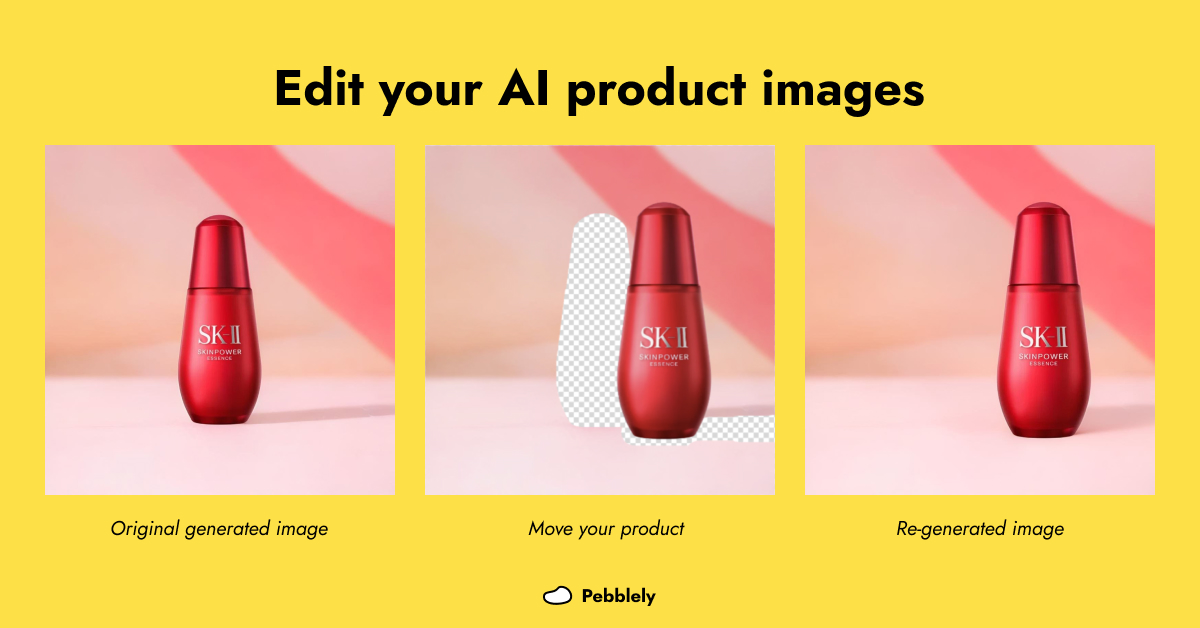
I moved my product, and its new shadow is generated accordingly. Now I can add text (via another tool) on the right of the product.
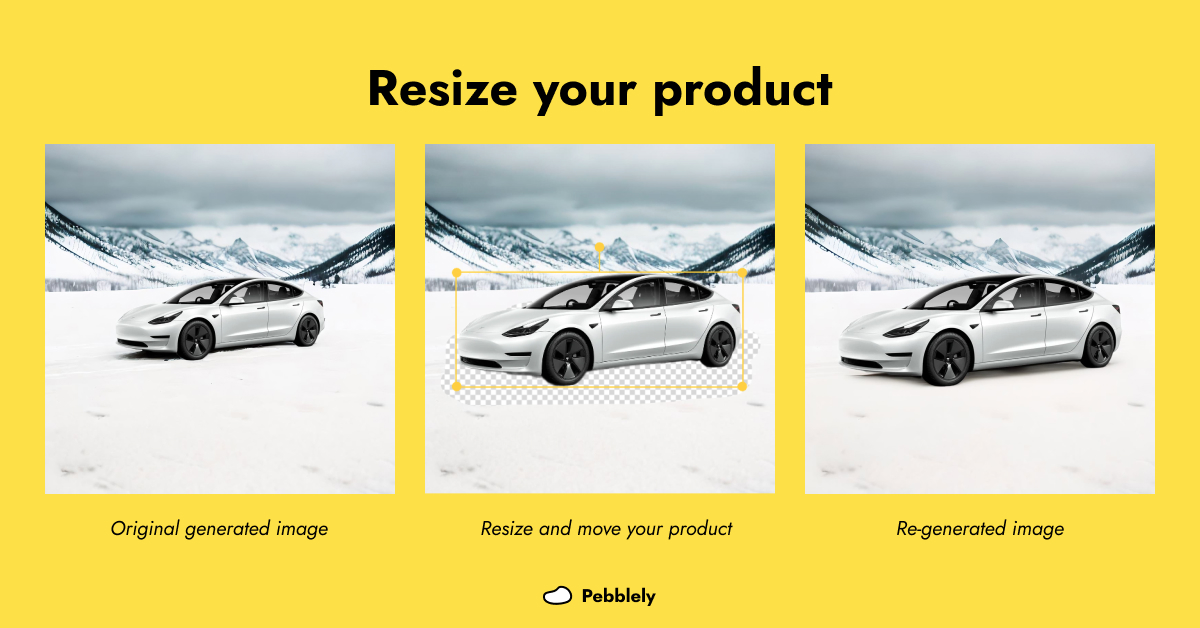
When my product looks out of proportion, I could resize and move it so that it looks proportional to the background.
Curious about how I did this? Here’s the trick:
How to edit your AI product images
This new editing feature is only available on our paid plans. Do grab a subscription to follow along if you want!
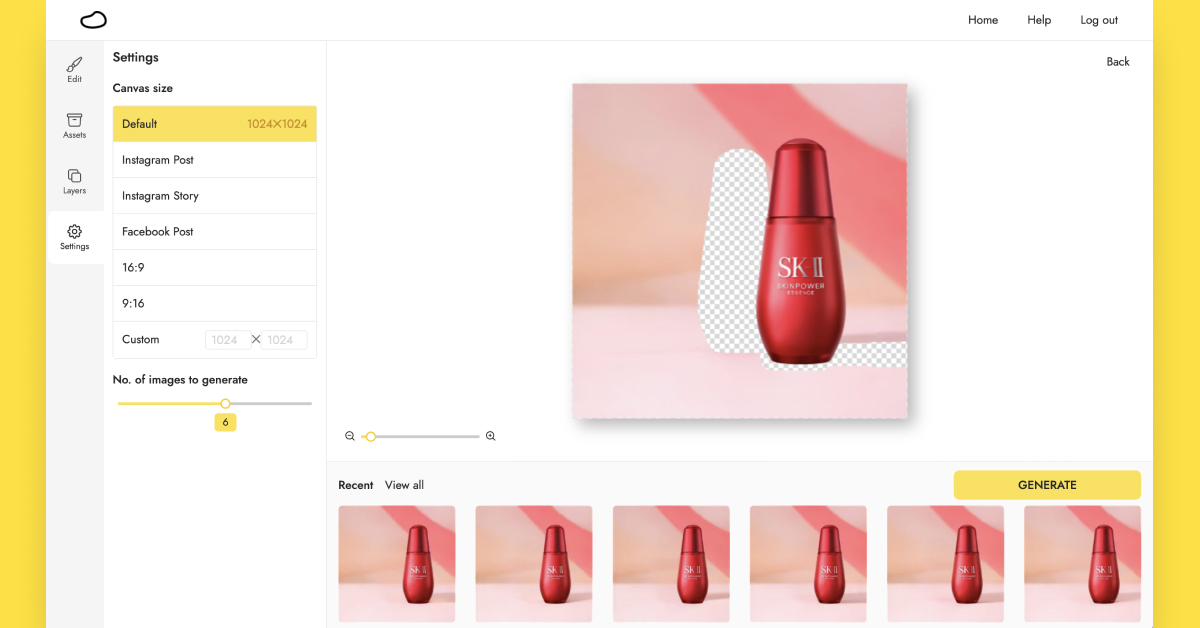
1. Go to the edit mode
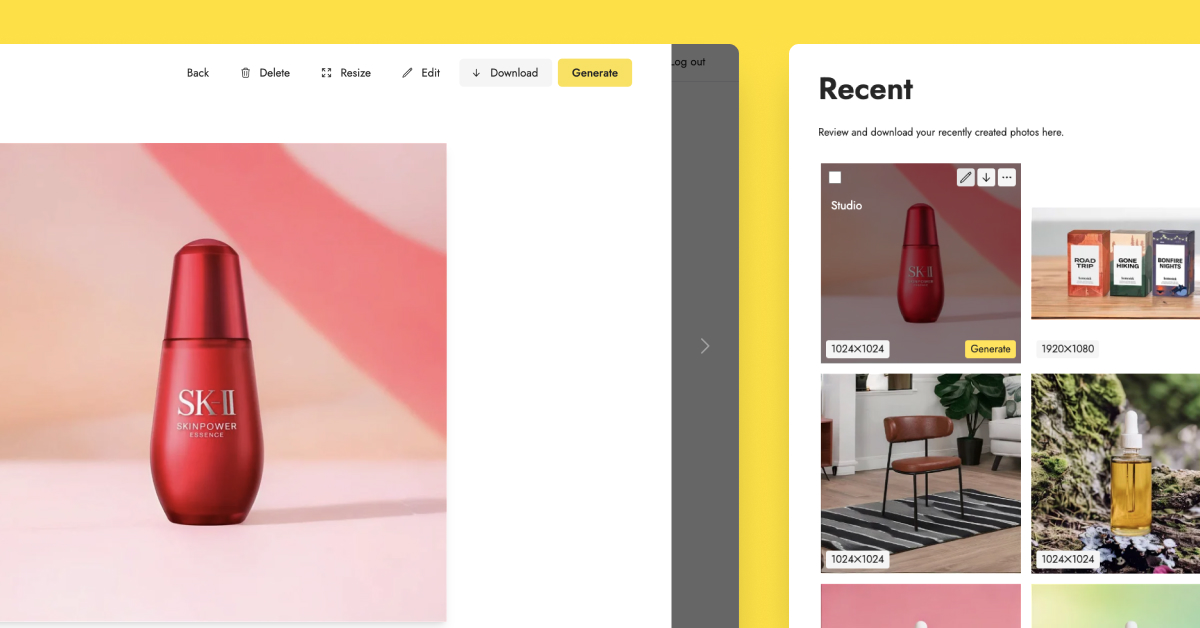
After you have generated an image, click on the image and select the new “Edit” button in the top-right corner.
If you are viewing your images under your recent images, you can click on the pencil icon to enter the edit mode.
2. Adjust your product
This is an optional step. If you are happy with the size and position of your product, you can skip this step.
But sometimes, you might want to move your product so that you can add some marketing copy on the side of the product. Or your product looks out of proportion, and you want to make it bigger or smaller.
To do that, go to the Layers tab on the left sidebar and select your product. Then…
- Move your product to another position on the image
- Change the size of your product
- Rotate your product
- Or do all three!
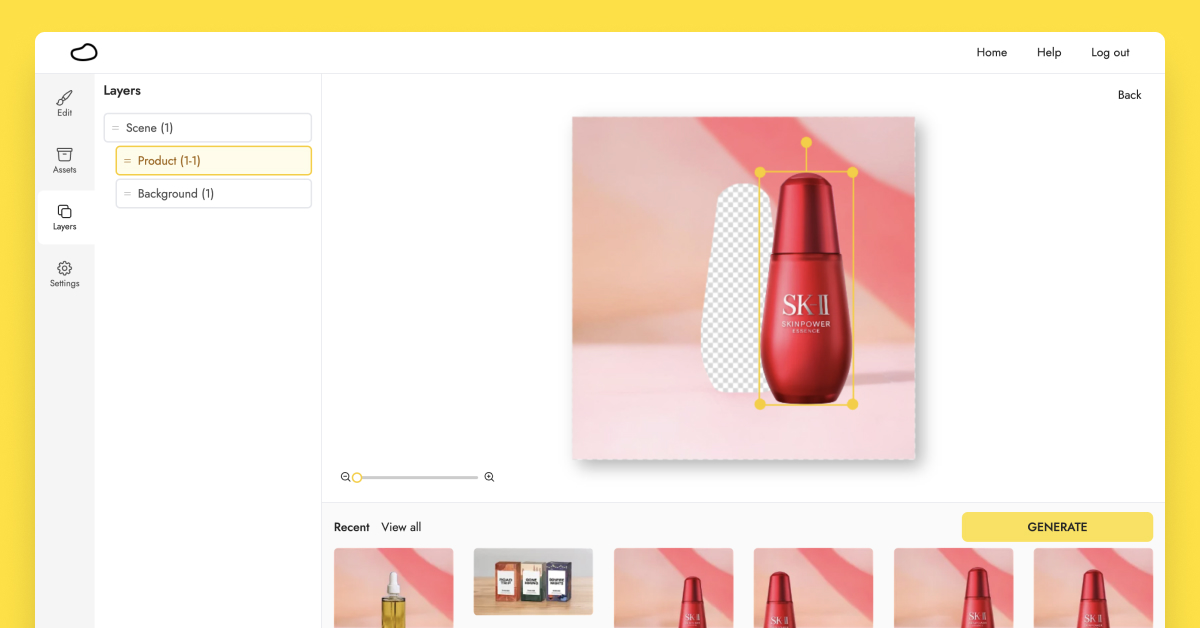
You can even select multiple products on the canvas by holding onto “Shift” on your keyboard and clicking on the products you want to select.
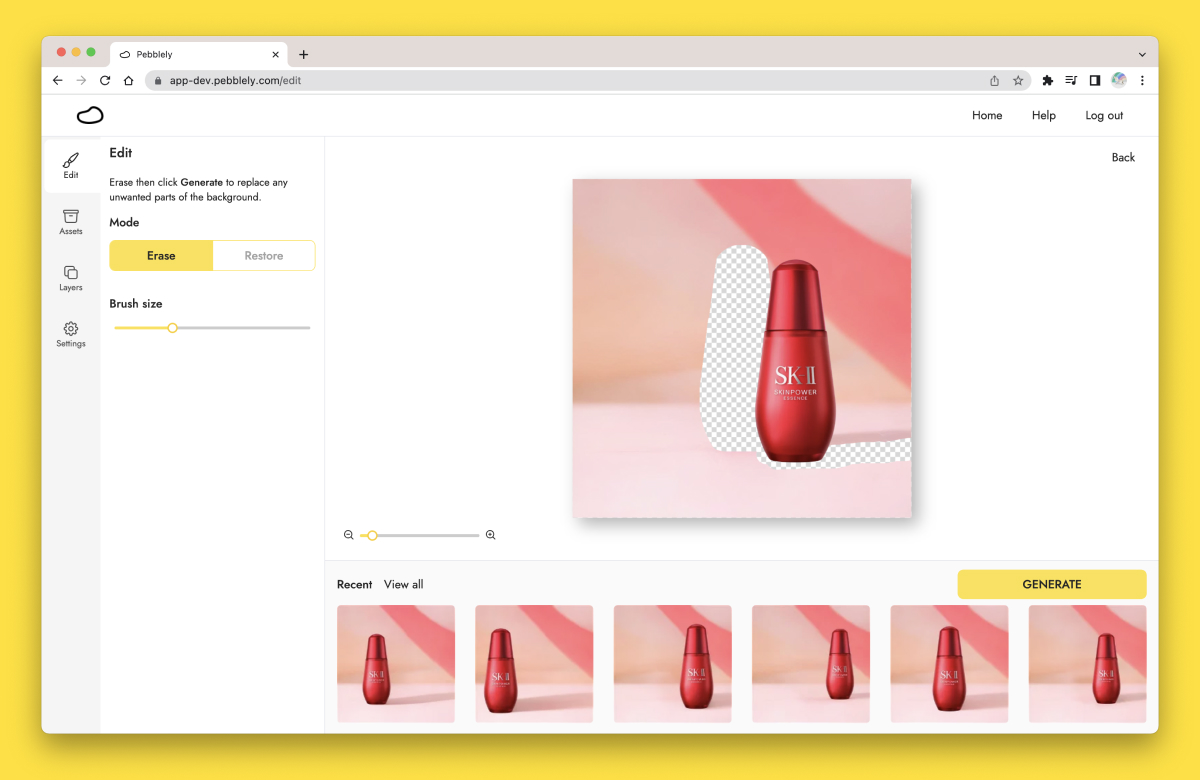
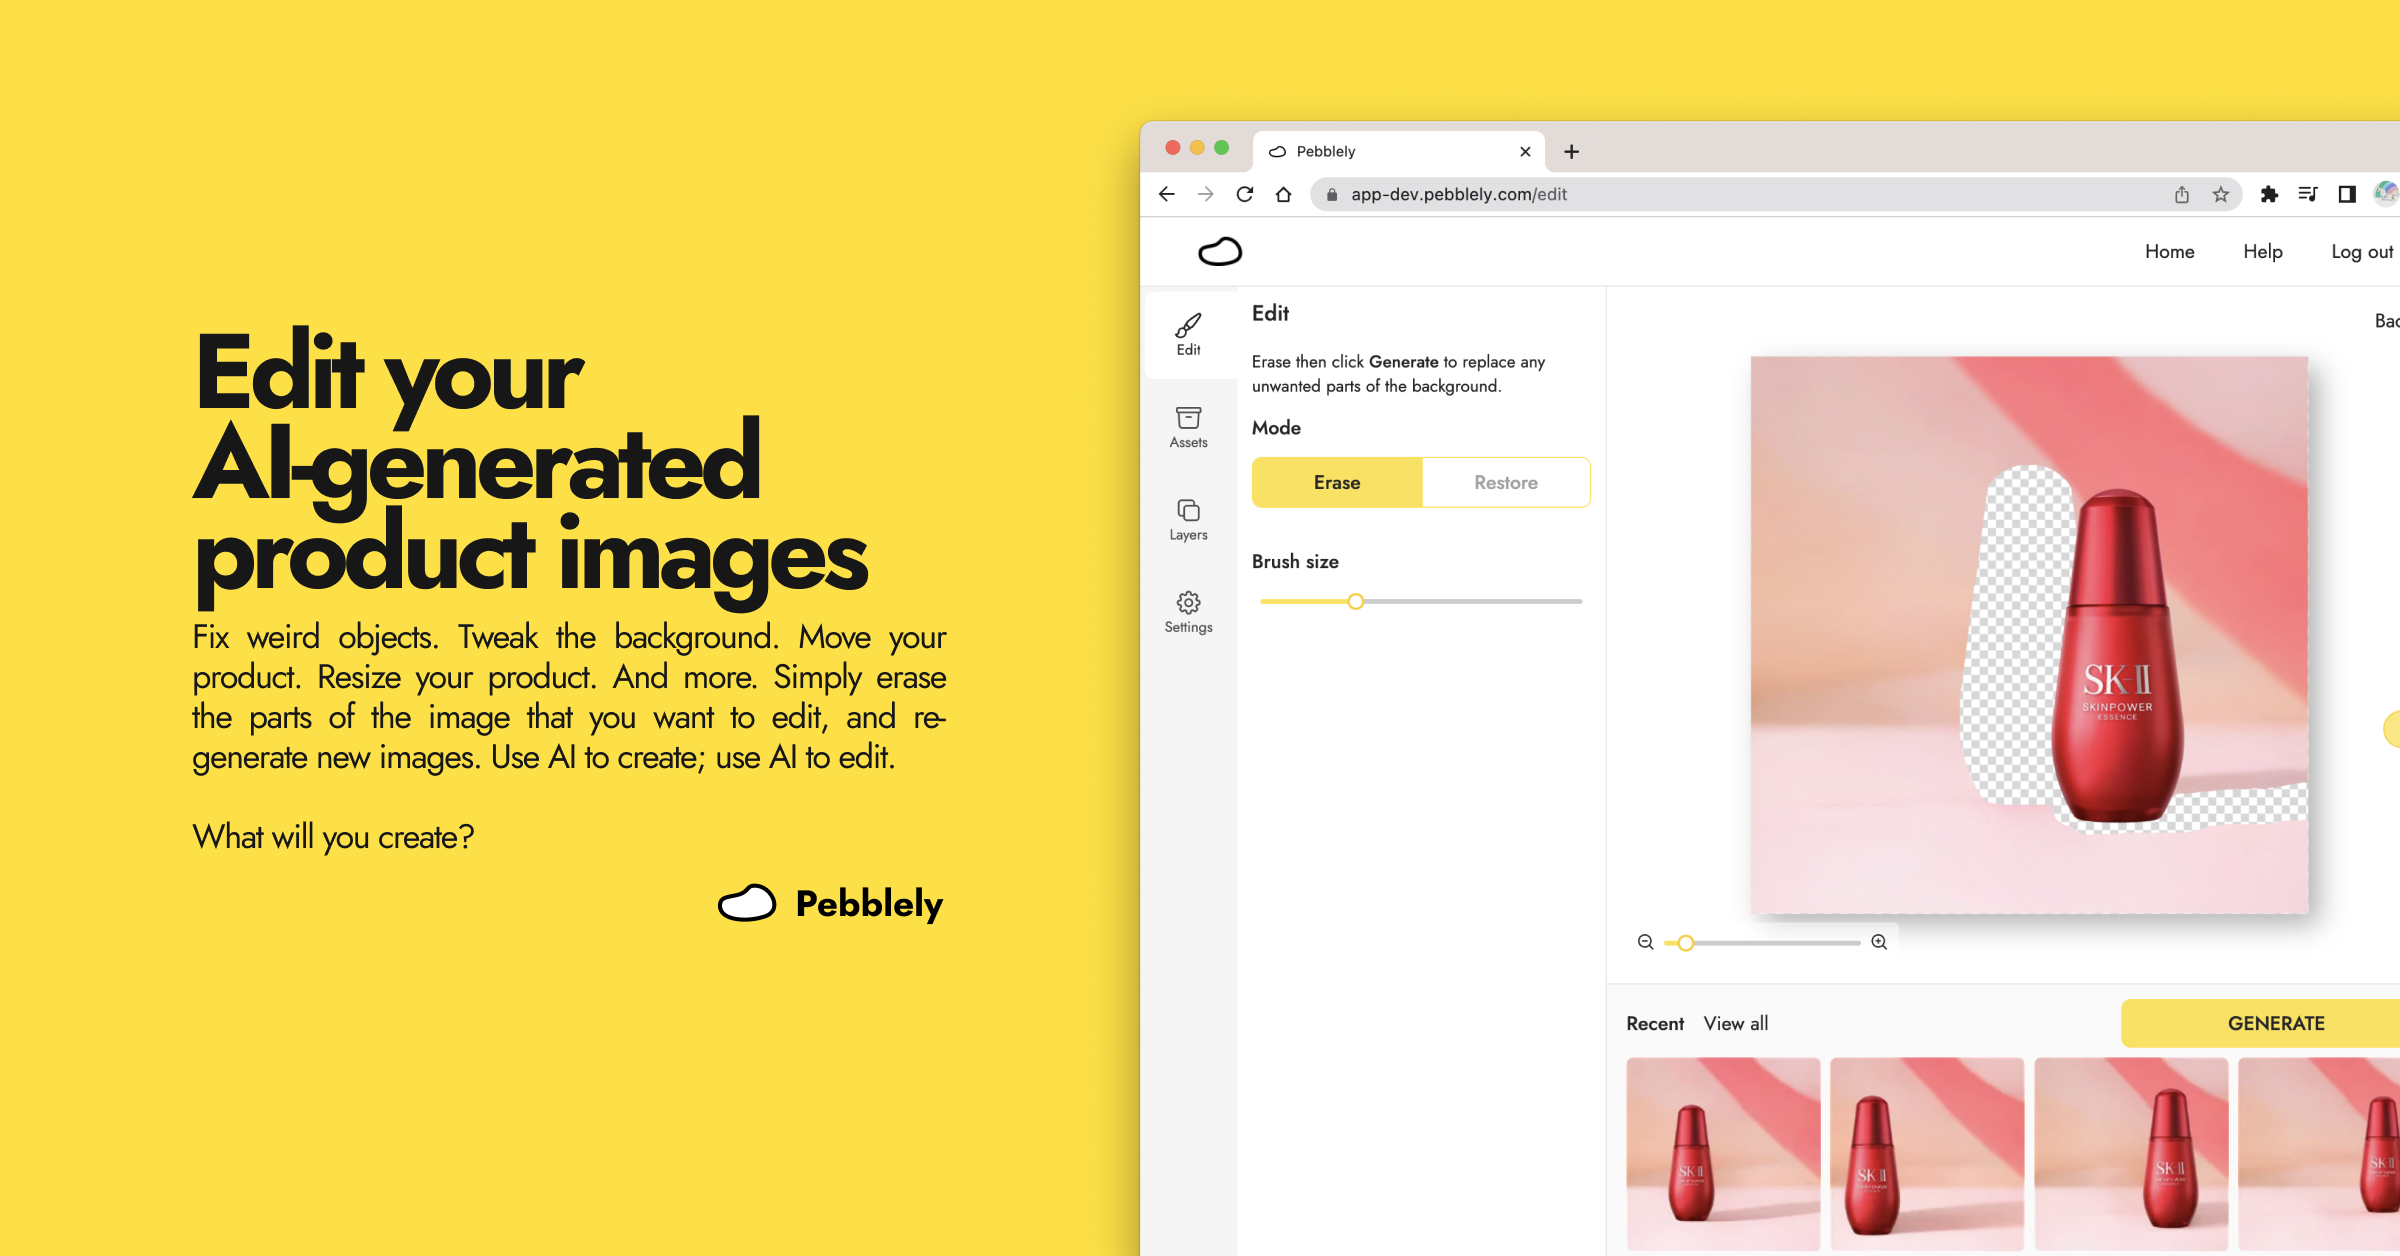
3. Erase unwanted background or objects
Admittedly, Pebblely sometimes generates odd-looking objects. You can erase them entirely (e.g. objects on a bookshelf), and Pebblely will re-generate a new background in that position. Or you can erase an object partially (e.g. part of a grapefruit), and Pebblely will try to complete the object.
Go to the Edit tab on the left sidebar. You can change the brush size and zoom to help you erase better. If you make any mistakes, switch the brush to “Restore” to restore what you have erased.
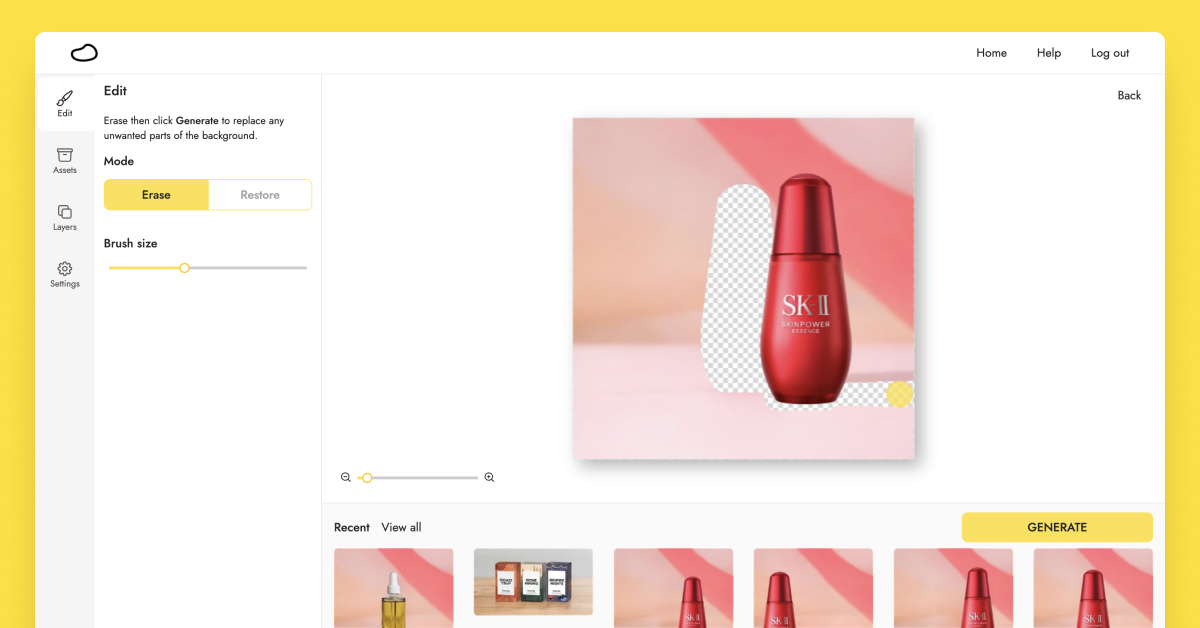
If you want Pebblely to re-generate a new shadow or reflection for your product in its new position, remember to erase the area where the new shadow or reflection should be.
Tip: If possible, keep parts of the existing shadow so that Pebblely will know to add a shadow there. You can see the example in the image above, where I intentionally left the shadow untouched. If you erase the shadow entirely, you might need to generate a few times to get images with the right shadow.
4. Re-generate new images
Finally, simply hit “Generate” to generate new images. Pebblely will automatically fill in the erased parts for you!
If you are not satisfied with the newly generated images, you can always generate more. You can also erase or restore the original image further to get different images.
Use AI to create; use AI to edit.
We created Pebblely so that you can use AI to create beautiful marketing assets of your product. But we know there is so much more you can do with AI. That’s why we added the multiple-product feature last week and this editing feature today. And we have more to share in the coming weeks!
What will you create?
Keep learning
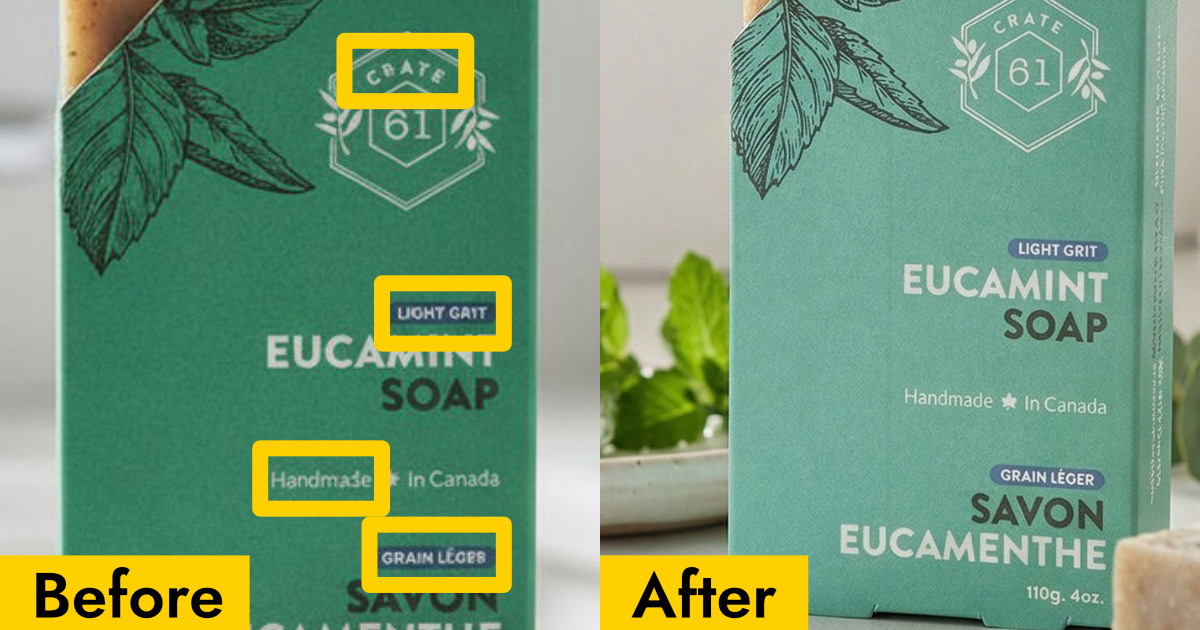
Why Your AI Product Photos Keep Getting the Text Wrong (and How to Fix It)
AI image generators often garble text on products. Learn how Pebblely automatically extracts and preserves text on labels, packaging, and branding.
10 AI Product Photography Prompts That Work
Struggling with AI product photo prompts? These 10 tested prompts generate beautiful, realistic product images every time.
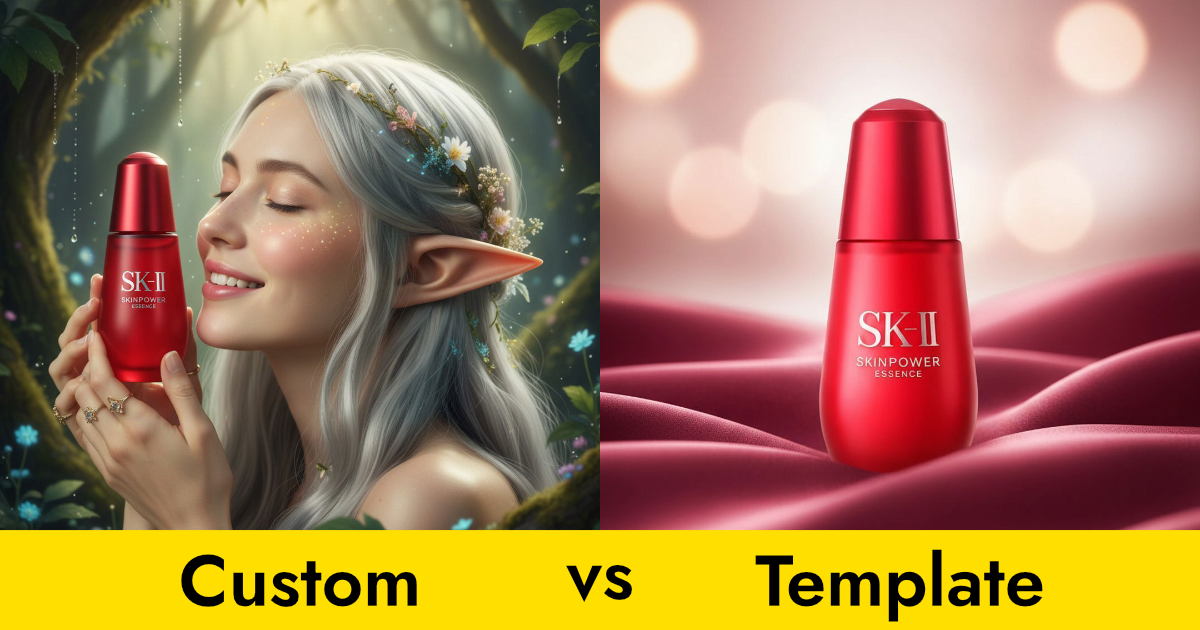
Custom Prompts vs Templates: Which Should You Use?
Pebblely offers two ways to generate product photos: templates and custom prompts. Here's when to use each for the best results.